In this Issue:
Recommended Training
LibGuides v2 Migration Training:
- Getting your v1 content ready for migration
- Helpful utilities for a smooth transition
- Schedule migration and 'Going Live' date
Sign-Up Today:
On Your Checklist: Five Tips & Tricks for Migrating to LibGuides v2
There it is, high up on your summer projects checklist: "Migrate to LibGuides v2."
We promise you, it's nowhere near as scary as that latest vampire book you just finished, so push your hesitations aside and jump right on it.
This edition of Springy Tips & Tricks focuses on the top questions we get from users during the migration process.
1. Help Is Here, Have No Fear <cue superhero theme music>
- Training - Each month we have dedicated 'Migrating to LibGuides v2' training sessions that cover the ins & outs of migrating to LibGuides v2. Whether you're just getting started or about to finish the process by 'Going Live' - this session has you covered.
Can't make a live session? Watch a recording! - Help Guides - Need a document outlining all the migration steps? Check. What about something that details all the new features in LibGuides v2? Check. What about a Quick Help Guide when you're just getting started? Check and Check. Check-out </pun> all the help resources we have for you:
- Helpful Checklists - downloadable checklists to help you track changes before & after migration.
- - (Admins) Pre-Migration Clean Up Checklist: Outlines key v1 areas for admins to review prior to migration.
- - (everyone) Pre-Migration Guide Clean Up Checklist: Guide-level tips for authors to review when cleaning up their v1 guides prior to migration.
- - Post-Migration Changes Chart: Spreadsheet template for tracking v1 boxes that need updating in v2.
2. Your v1 Site is NOT Connected to Your v2 Site
This is one of our most frequent questions, and we're including it here as an important reminder. Your beta site is an entirely separate system. This means that they are not connected in any way.
Important Tidbits:
- Updating content in your v1 system does not update in your v2 system.
- Building a Guide in your v1 system does not auto-generate a guide in your v2 system.
- Accounts in your v1 system do not automatically appear in your v2 system.
- Deleting content in your v1 system does not delete/remove content in your v2 system.
Bottom Line: Your v1 and v2 site are not connected in any way, and the only time content
auto-appears in your v2 system is during your scheduled content migration.
3. Migrating Database Links from v1 to Assets in v2
LibGuides v2 has a dedicated Database A-Z asset management area. This video covers identifying Database URLs in your v1 system and migrating them to their specified asset management area in v2.
4. Your URL Won't Change - We Promise ;)
While you're in beta (Steps 1-4), your URLs are in a temporary state. Once you go live with LibGuides v2, your v1 URL will map over onto your v2 system.

Important Tidbits:
- Do not change current links to '*beta.libguides.com' > these links will break once you 'Go Live'.
- You'll see links point to your v1 system and that's okay! Once you go live, those links will redirect to your v2 system.
- Page-Level URLs have changed in v2, but don't worry - redirects from the v1 page-URL will redirect to your new v2 page-URL once you're live.
- Links to Box-Level URLs in v1 will redirect to Page-Level URLs in v2.
- If you have a custom domain, you will need to get IT involved to create new C NAME records.
5. Moving from v1 to v2: Step-by-Step
Moving from LibGuides v1 to LibGuides v2 is a 5-step process, where each step is completely controlled by you. And we're here to help, your trusty Springy sidekicks.
Legend of the Process:
|
Step One: Requesting Your |
Step Two: Learn LibGuides v2 & Clean-Up v1 Guides |
Step Three: Migrating Your Content |
Step Four: Post Migration Updates |
Step Five: Going Live |
Step 1. Requesting Your LibGuides v2 Beta Site:
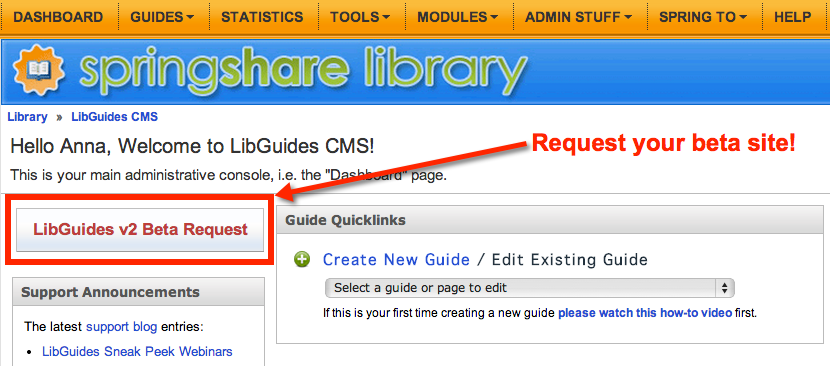
Don't be fooled by the word 'beta'. In this case, beta implies sandbox. A playground for you to play in and get comfortable with LibGuides v2.
Requesting your Beta Site:
Pick one system-admin to be the migration administrator. They'll:
- Login to LibGuides v1 and select 'Request a Beta Site'
- Check their inboxes for an email from LibApps. Don't see it? Check your spam folder!
Important Tidbits:
 The login link is now at the bottom/center of the page: "Login to LibApps"
- The email account that requested the v2 beta site is the only account that can login to your v2 system.
- - Need to create more accounts? Go to Admin > Accounts > Create Accounts.
- Your v2 Beta site is on a temporary domain, but it will become your live site. Having it on a temporary domain is how we're able to separate your live v1 site from your beta v2 site.
- - Your existing v1 URL will become your v2 Beta site in Step 5: Going Live.
 The login link is now at the bottom/center of the page: "Login to LibApps"
Step 2: Learn LibGuides v2 & Clean-up v1 Guides
Playtime isn't just for kids.
- Learn the new functionality
- Customize the look & feel and create guide-level templates
- Take training sessions & teach colleagues
LibGuides v2 is built upon an entirely new code structure. Because of that, you might want to do a little clean-up before moving your v1 Guides over. Think of it this way, if you're moving to a new house - there's no need to pack the broken waffle maker, now is there?
- Weed old/stale guides, subjects, accounts, etc.
- Delete bad links
- Learn what will/won't be migrated
- Get content ready for migration
- etc.
Learn HTML/CSS
for Bootstrap
LibGuides v2 is built upon the Bootstrap framework allowing you to deliver mobile-responsive displays with customizable templates.
Check out our recommended resources for brushing up on your HTML/CSS skills.
- CodeAcademy.com: Approachable HTML & CSS Tutorials with an introduction to Bootstrap.
- GetBootstrap: Solid explanation of Bootstrap HTML, Grid-System, and Media Queries.
- Inspect Element: Learn how to view CSS classes & IDs in-context in 5min.
Step 3. Migrating Your Content
Content migration is one big copy operation. We copy all of your content (excluding customizations) from LibGuides v1 into your LibGuides v2 system.
Your v1 system remains your live system with all your content still public & available.
Important Tidbits:
- Schedule content migration (30 day rolling window) right from within your LibGuides v1 system.
- One-time migration: The nature of reusability within LibGuides means we can't redo migrations or perform partial migrations. It's all or nothing.
- There is no 'undo' button: so please select your date wisely!
Pro Tips
After Content Migration occurs, don't build any more guides in LibGuides v1.
'Go Live' within 30-60 days of content migration. Any longer, and you'll run the risk of having to update a lot of guides in v2.
Step 4: Post-Migration Updates
Update your newly migrated guides to take advantage of the new functionality.
For Admins
- Review Assets:
- - Did everything migrate into the proper asset area?
- - Are there duplicates?
- - Assign subject categories to assets
- Tag Database Assets:
- - Vendor
- - Database Type
- - Subject Categories
- - New/Trial
- - Friendly URL
- Create a Shared Image Library
- Review Accounts, Subjects, Tags, Friendly URLs
For Guide Authors
Organization & Maintenance:
- Organize images into folders
- Assign subject categories to assets
- Update your LibApps Profile
Guide-Level Fun:
- Resize the browser window so you can see what your guide will look like on tablet/mobile screens
- Mix & Match content within the box
- Build Tabbed Boxes & Image Gallery Boxes
- Create Top/Bottom Spanning Boxes
- Experiment with guide-navigation styles
- Display guide as single page
- Add Prev/Next links
Step 5: Going Live
'Going Live' is the final step in migrating to v2. In this step, we replace your temporary v2 URL with your current v1 URL. So when users access your URL, they'll be redirected to your v2 system.
During the 'Go Live' process, there is a small amount of downtime as your domain changes are propagated.
Before Going Live:
- Schedule it when it's least disruptive for users.
- Communicate with colleagues so they'll be aware & informed.
Without a Custom Domain
Moving your v1 site to Temp Domain
In order to move your v1 site URL to your v2 site, we need to assign a new URL to your v1 system. You'll be able to access your v1 system at your new URL for 6 months after going live.
- Example: neato.v1.libguides.com
- Login to your v1 site > Select 'Review Your Migrated Data' from the "LibGuides v2 Info" dropdown on your Dashboard > Scroll to Step VI
Going Live with v2
Now that your v1 site is on a new URL, we can move your permanent URL to map onto your new v2 system.
- Login to your v1 site at its new domain > Select Take Your LG2 Site Live from the drop-down menu.
- Scroll down to Step VII > Click to Process
With a Custom Domain
Moving your v1 site to Temp Domain
In order to move your v1 site URL to your v2 site, we need to assign a new URL to your v1 system. You'll be able to access your v1 system at your new URL for 6 months after going live.
- Example: neato.v1.libguides.com
- Login to your v1 site > Select 'Review Your Migrated Data' from the "LibGuides v2 Info" dropdown on your Dashboard > Scroll to Step VI
Going Live with a Custom Domain
If your LibGuides URL ends in .org, .edu, .gov, or .info - then you have a custom domain. Here's you'll need to do:
- Ask your IT department to create a CNAME record for both your internal & external nameservers, pointing your custom domain to v2.libguides.com.
- Important: This step can take up to several hours to complete. After it's done, your custom domain will redirect to http://springshare.com, and you're on the right track.
- Once IT has added the new CNAME, they can remove the old A and CNAME records.
- Once your custom domain is redirecting to http://springshare.com, login to your v1 site and Take Your LG2 Site Live > Complete STEP VII.
